Read More http://www.kevinandamanda.com/whatsnew/tutorials/how-to-use-a-cute-font-for-your-blogger-post-titles.html#ixzz1CADyuDMP

Friday, August 20, 2010

Cotton Candy

A few weeks ago we had a circus theme week.  One of the crafts we did was make cotton candy (non-edible).  My daughter had a friend over and they both enjoyed this easy craft!

We started the day off with a clown coloring sheet.

Rolling up the handle of the cotton candy also works as a telescope. :)

Spreading out some cotton.

Glue cotton balls onto the paper along with the handle.
Practice handwriting by writing "Cotton Candy" 

Ta da

To finish up the craft I served real cotton candy (found at Kroger).  


Wednesday, August 11, 2010

Terra Cotta to Coasters

Somewhere in bloggy world a few months ago I saw a post about terra cotta saucers turned into coasters.  Brilliant.  I've been looking for a set of coasters for ages that will match my decor and will catch the perspiration.  In other words, I hate a coaster that the perspiration from my glass just drips off the sides.  Well, this my friends is the answer.  I envisioned them with scrapbook paper of a map but after weeks of looking for map paper I gave up.  I settled on some fall paper.  I figured that this easy project would be fun to do again so I can re-create some new ones for each season.  I was also thinking some cute Christmas paper might be cute as little teacher gifts in just a few short months.


First, I painted the outside of the saucers brown with acrylic paint.  I painted two coats.

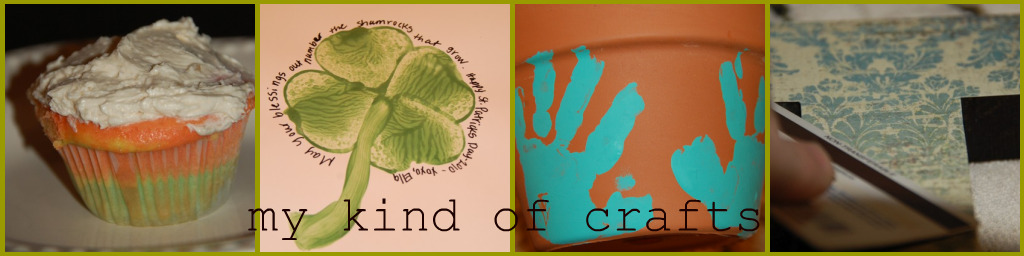
After the paint dried I Mod Podged the scrapbook paper onto the saucer and used a plastic card to get out the bubbles.  After a few minutes passed I coated the whole thing with Mod Podge.  After they sat for a few minutes I put one more coat of Mod Podge.

I cut out some felt (will try to be more exact next time!) and hot glued it to the bottom.  There is probably a better adhesive but that's what I had at home today.

Nice set of four coasters

Much nicer than the newest catalog I've been using as my coaster!

Now if the temp would just drop about 20 degrees it would begin to feel like fall is near. ;)


giveaways The Girl Creative

Pizza Bites

Every kid loves pizza.  Here's an easy and quick dinner your kids will surely enjoy.  What's even better is I hid broccoli in these yummy pizza bites and not one of the four kids that ate them for dinner noticed!

I used reduced fat Crescent rolls.  Unrolled them and cut them into rectangles.  Smeared some pureed broccoli on first, layered mini pepperonis, sprinkled some cheddar cheese then brought all four corners together and rolled into a ball.  Once I had them all in a greased cake pan I brushed melted garlic butter on top and baked for 12-15 min at the temp on the pkg (don't remember at the moment).


I served them with a side of warmed pizza sauce and Ranch dressing.  They were pretty good and I will definitely make them again.

Enjoy!


giveaways

Wednesday, August 4, 2010

Library tote

Here's an easy tote bag for your little ones to use at the library for all those fun books they are checking out.

We picked up the canvas totes and fabric paint at Hobby Lobby.  The bags were $3 (I think) and the paint was $.99 each.  I let each kid choose two colors.  We used cookie cutters to makes designs on the bags.  My daughter thought this was so much fun and loves her new bag!


Monday, August 2, 2010

Lemon Blueberry Bread

Two of my favorite things: lemons & blueberries!  

I bought the big container of blueberries at Costco and they weren't getting eaten as fast as they should so rather than letting them go bad I found a delicious recipe to bake.  You can make two loaves or one bunt cake.  I chose to make the bunt cake because it looks prettier. :)


Lemon Blueberry Cake Recipe
  • 1 cup butter (1/2 pound), softened
  • 2 cups sugar
  • 1/2 teaspoon salt
  • 2 Tablespoons lemon peel, grated fine
  • 4 large eggs
  • 2 1/2 cups unbleached white flour
  • 1 teaspoons baking powder powder
  • 1 cup milk
  • 1 cup blueberries, fresh or frozen

  • Preheat oven to 350 degrees.

  • Spray two 9 x 5 inch loaf pans, a bunt pan or 5 mini pans with vegetable spray.

  • Combine flour and baking powder in a separate bowl and set aside.

  • Using a high-speed mixer on medium speed, beat the butter, sugar, salt and lemon peel until creamy and fluffy, about 5 minutes. Scrape bowl often.

  • Add eggs, beating well. Scrape again. Add flour mixture, beating and scraping.

  • Take bowl off mixer and pour in the milk. Fold all ingredients with a spatula until mixed well. Gently mix in blueberries. Pour into prepared pan(s).

  • Bake at 350 degrees for 50-60 minutes, until tops are lightly browned and knife comes out clean.

  • Meanwhile, start making the lemon syrup. Keep syrup warm. It can be reheated later.

  • Cool at least 5 minutes in the pan(s). Prick the cakes all over with a fork or skewer.


  • Lemon Syrup Recipe:


    • 3/4 cup sugar
    • 1/2 cup fresh lemon juice
    Directions for Lemon Syrup
    • Combine sugar and lemon juice in small saucepan and cook over medium heat just until it comes to a boil, being careful not to burn.
    • The sugar needs to be completely dissolved. Remove from heat.
    • Keep syrup warm until cakes are ready to be brushed and soaked.
    • Reheat syrup if necessary. It is important to pour hot syrup over the cakes, otherwise it won't get into all the nooks and crannies.
    • Pour and brush equal amounts of lemon syrup over the tops of the tea cakes making sure that you get all surfaces coated. Let some drip down into the bottom of the pans.
    • Leave the cakes in the pans if they are decorative and disposable, or carefully pop them back out immediately otherwise they will stick.
    • Let cool on wire racks completely before wrapping.
    • These cakes freeze well. Enjoy!
    • Yields 2 large loaves.

  • Sugary mixture - yum!

    Ready to bake


    Delish!


    Enjoy!


    The Girl Creative