Read More http://www.kevinandamanda.com/whatsnew/tutorials/how-to-use-a-cute-font-for-your-blogger-post-titles.html#ixzz1CADyuDMP
Showing posts with label crafts. Show all posts

Tuesday, April 12, 2011

Make a Rainbow with your Kids

Have you ever wondered how to make a rainbow with your kids?  Here's an easy way to make one in your kitchen!  All you need is glasses, water, food dye and a spoon.

Step 1: Line up six glasses and fill every other glass about half full with water.
Step 2: In the first glass put 3 drops of red food dye and stir.
Step 3: In the third glass put 3 drops of yellow food dye and stir.
Step 4: In the fifth glass put 3 drops of blue dye and stir.
Step 5: Pour a little of the red and yellow into the second glass and you get orange.
Step six: Pour a little of the yellow and blue into the fourth glass and you'll get green.
Step seven: Pour a little of the red and blue into the sixth glass and you'll get purple.

Lastly,you can pour a little of each color into another glass and you'll get brown.

Now you've made a RAINBOW!


Now if it would just rain outside we could try and find a real rainbow.  I really want to capture a rainbow on film or memory stick. ;)


Wednesday, February 9, 2011

Kool-Aid Play dough

I remember when I was a child my mom made homemade play dough for my brother and I to play with.  I have no idea what recipe she used but it was a lot of fun to play with.  I don't know a child that doesn't enjoy playing with play dough!

February was my month to bring play dough to my daughter's pre-school class.  I'll be honest, I've never made homemade play dough before.  We've always had the store bought kind so I've never gotten around to making it.  Last week I had a note on her bag with a recipe.  We went to the store and picked out a few flavors of Kool-Aid (which my kids have never had before!).  My daughter wanted to make hot pink and she chose red for her brother.  We also picked up light pink but haven't made that one.  It was a lot of fun to make!  However, my daughter was slightly disappointed when when "hot pink" looked exactly like her brother's red.  Oh, well.  Live and learn.

Recipe for Kool-Aid Play dough

2 1/2 cups flour
1 cup salt
2 packages Kool-Aid
2 cups boiling water
3 tsp oil

Mix Dry ingredients
Add oil and boiling water

Play!

**I didn't read closely and did not notice it said 1 cup of salt.  I barely had enough salt to make two batches.


This play dough smells good, too. :)

giveaways

Tuesday, January 25, 2011

Shadow Box Display

This past summer my husband and I went to Exuma, Bahamas with some friends.  It is one of the prettiest islands I've ever been to.  You should go if you ever get the chance.  There is a sandbar we checked out while boating one day.  The guys were able to bring back quite a few sand dollars.  I'd never seen any this big before.  I actually found one myself.  It's one of the smaller ones.  I knew right away that I was going to display them in our guest bathroom where I have a painting we picked up in Maui on our honeymoon.  We sort of have a beach theme in there now.  I went to Hobby Lobby and picked up a shadow box and matte board.  I used a paper cutter here at home to cut the board down.

I chose four sand dollars to mount to the board, two smaller and two larger.


 My supplies - shadow box, matte board, sand dollars & epoxy (not pictured)


Mixing the epoxy.

I laid them out how I wanted them.

Then put the glue around the edges and wiped away the messes.

Here's my shadow box hanging in the bathroom.

Just so you know there's color in there, it's hanging across from this!  On the counter is a photo I took in Exuma and shells we have collected from various Caribbean islands.  I'm going to enlarge another photo I took and hang it to the right of the shadow box.

giveaways

Saturday, October 30, 2010

Painting Pumpkins


I meant to post this right after we did this craft but I forgot.  Oh, well.  This was so easy but yet so fun!  My kids loved it, especially my two year old son.  I bought a couple pie pumpkins - 2 for $4.  I gathered a few acrylic paints that I hand on hand.  None of them were Halloween colors but my kids didn't care.  I gave my daughter pink and purple and my son turquoise.  I gave them each a paint tray with a sponge brush and let them paint away.  This kept them busy out back for at least an hour.  I was loving it.  It gave my lots of practice time with my new camera lens! :)

Have a happy and safe Halloween!


After the paint dried I added a layer of Mod Podge and then my daughter added glitter to the pink and purple pumpkin but I forgot to take a picture afterwards.  

Monday, October 11, 2010

Halloween Frame and Decor

With Halloween coming up I wanted to put out some decorations and add to what I already had without spending a lot of money.  I had some unfinished frames from Ikea and scrapbook paper I didn't end up using I bought for the Boo Wreath.  I decided to make a Halloween frame.  I used the Mod Podge technique.  Initially I thought I'd frame a picture of the kids in the their costumes from last year but I didn't have any printed.  I decided it'd be easier to throw something else together than upload a picture and make a trip to Costco to get a picture!   I came up with a framed bat.  I think it's cute and my kids love it!  Maybe next year I'll have some printed out pictures and frame one of them in the costumes.


 Once I had it on the mantle I decided I needed something else to even out the space so I found another frame that wasn't being used and glued a skeleton to some scrapbook paper and came up with this guy...


Here's the finished mantle.  I'm going to grab some of that webby stuff to add a little more to it.


Linking to:
Skip to my Lou
The Girl Creative
Somewhat Simple Halloween
Tatertots and Jello

Friday, October 1, 2010

Boo Wreath

It's October and that means it's getting cooler outside AND it's time to put out pumpkins and fall decor including Halloween decorations!  I do not have a fun Halloween wreath for my front door.  When I saw this one made by Craftaholic Anonymous on eighteen25's blog I thought, "That is cute and I can totally make that!"  Eighteen25 had different guest bloggers all throughout September posting fun Halloween ideas.  You should jump over and check out all the craftiness over there.

I followed the directions on her blog.  I bought my materials at Hobby Lobby.  The burlap was $3.99 and I have a lot left over.  I don't think I made mine as full.  The letters were $2 and I spent less than a $1 for the scrapbook paper.  The styrofoam wreath was $4.49 and I used the 40% off coupon.  I had the Mod Podge and paint.  This was a pretty inexpensive project and I think it turned out Boo-tifully!


Linking to the eighteen25 Linky partyJust a Girl & Skip to my Lou.


Friday, August 20, 2010

Cotton Candy

A few weeks ago we had a circus theme week.  One of the crafts we did was make cotton candy (non-edible).  My daughter had a friend over and they both enjoyed this easy craft!

We started the day off with a clown coloring sheet.

Rolling up the handle of the cotton candy also works as a telescope. :)

Spreading out some cotton.

Glue cotton balls onto the paper along with the handle.
Practice handwriting by writing "Cotton Candy" 

Ta da

To finish up the craft I served real cotton candy (found at Kroger).  


Wednesday, August 11, 2010

Terra Cotta to Coasters

Somewhere in bloggy world a few months ago I saw a post about terra cotta saucers turned into coasters.  Brilliant.  I've been looking for a set of coasters for ages that will match my decor and will catch the perspiration.  In other words, I hate a coaster that the perspiration from my glass just drips off the sides.  Well, this my friends is the answer.  I envisioned them with scrapbook paper of a map but after weeks of looking for map paper I gave up.  I settled on some fall paper.  I figured that this easy project would be fun to do again so I can re-create some new ones for each season.  I was also thinking some cute Christmas paper might be cute as little teacher gifts in just a few short months.


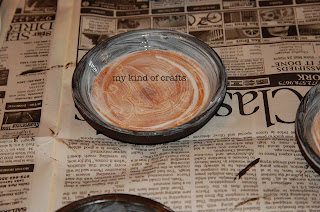
First, I painted the outside of the saucers brown with acrylic paint.  I painted two coats.

After the paint dried I Mod Podged the scrapbook paper onto the saucer and used a plastic card to get out the bubbles.  After a few minutes passed I coated the whole thing with Mod Podge.  After they sat for a few minutes I put one more coat of Mod Podge.

I cut out some felt (will try to be more exact next time!) and hot glued it to the bottom.  There is probably a better adhesive but that's what I had at home today.

Nice set of four coasters

Much nicer than the newest catalog I've been using as my coaster!

Now if the temp would just drop about 20 degrees it would begin to feel like fall is near. ;)


giveaways The Girl Creative