Wednesday, May 5, 2010
Picnik
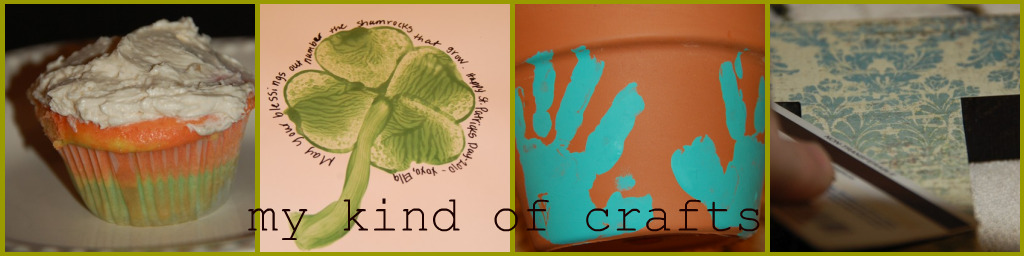
Have you been to the website picnik? It's a fun photo editing site. You can use it for free or upgrade for a small fee. I use the free stuff. I made the collage for the header of the my blog (and my personal blog) on picnik's site. It's so easy. You can do all kinds of fun stuff with your pictures, including changing to black and white, sepia, adding stickers, text, etc. Go on over and give it a whirl.


Mom*tog giveaway
If you shoot a dSLR camera this is a great giveaway for a book to help you learn how to shoot in manual.
Wednesday, April 21, 2010
Coffee Ground Fossils
One thing I try to teach my children about is the earth and how we can protect it. I talk about Earth Day and what it means every year but also throughout the year I try to make sure they are learning about recycling and little things they can do to help out and be "green". My daughter received Fancy Nancy: Every Day is Earth Day in her easter basket. I wanted to do a project using things around the house for Earth Day. Here's an easy fossil project that not only teaches about Reusing but you can also teach about fossils...we got into a great dinosaur discussion.


Ingredients:
1 cup coffee grounds
1/2 cup cold coffee
1 cup flour
1/2 cup salt
In a mixing bowl, mix together the ingredients until mixed well.

On wax paper, flatten into small discs then use something round to cut a circle. I used my metal measuring cup.

Use something small to press into discs to make impressions, like cookie cutters or play-doh cutters.

After they sit overnight the fossils lighten up and the impressions are more visible.

Happy Earth Day!
Red Velvet Cake Balls
I'm not really a Red Velvet Cake fan, but oh my, these are delicious! This is my first attempt at cake balls. You can find lots of fun ideas on Bakerella's site.
They are really quite simple to make. All you need is one box of cake mix (with the required ingredients), tub of frosting & bag of candy melts, such as Wilton which can be purchased in cake decorating section at craft store.
First, make a cake mix according to package. Let cool. Then crumble to pieces in a mixing bowl. I use a potato masher to do the crumbling.

Then add in one tub of frosting. Mix well. I used Butter Cream but will use cream cheese next time. Butter Cream works just fine and tastes great but I want to compare since Bakerella's site says to use cream cheese.

Once it's mixed well roll into balls and place on a wax lined cookie sheet. Place in the fridge for a few hours or in the freezer for at least 30 minutes until firm.

Once the cake balls are firm melt the chocolate in the 30 second increments. Use a spoon to roll the balls in the chocolate and place on the lined sheet to dry. They dry pretty fast.

Enjoy!
Monday, April 19, 2010
Painting Flower Pots
We're getting ready for Earth Day by planting flowers seeds. First, we must decorate the plain jane terra cotta pots. This project was quite simple and only took a couple minutes. All you need is terra cotta pots, acrylic paints, Krylon finishing coat/sealer.

Each of my kids picked a color of paint and I squirted some onto a paper plate. Then they rubbed each hand in the paint and then made their handprints on the pots. On the back of each pot I painted their name and date. We could have added more decoration but I like them nice and simple. After the paint dried I sprayed the pots with the Krylon. After they are finished drying for a day or two we'll plant the seeds!


Each of my kids picked a color of paint and I squirted some onto a paper plate. Then they rubbed each hand in the paint and then made their handprints on the pots. On the back of each pot I painted their name and date. We could have added more decoration but I like them nice and simple. After the paint dried I sprayed the pots with the Krylon. After they are finished drying for a day or two we'll plant the seeds!


Friday, April 16, 2010
Marshmallow Brownies
This week was teacher appreciation week at my daughter's pre-school. We had been in California visiting family the past two weeks and while away I received an email with three things to bring on Wednesday. Well, I completely forgot all about it until Tuesday afternoon! I had tons of emails in my inbox so I scrolled and scrolled until I found it and it did say dessert for one of the items. Thank goodness I had a box of brownies in the pantry. I wanted to shake things up and try something different with them though. I looked and next to the brownie box was a bag of mini marshmallows. Sounded like the perfect combo to me!
I simply followed the directions on the box and then stirred in about half a bag of marshmallows. Poured into a greased 13X9 pan and baked according to the box. Unfortunately I didn't get to try any but they looked and smelt great.


I simply followed the directions on the box and then stirred in about half a bag of marshmallows. Poured into a greased 13X9 pan and baked according to the box. Unfortunately I didn't get to try any but they looked and smelt great.

Brownie mix batter

Adding in the marshmallows

Ready, set, bake!

Delish!
Chocolate Chip Banana Muffins

I love chocolate, bananas and baking. Combine them all together and you get the perfect combination: Chocolate Chip Banana Muffins. This is one breakfast my kids certainly enjoy!

Recipe:
1 1/2 cups flour (I use 1 cup unbleached flour & 1/2 cup whole wheat flour)
1 1/2 tsp baking powder
1/4 tsp baking soda
1/4 tsp cinnamon
1/8 tsp salt
dash of cloves
1 egg
1 cup banana (3 medium)
3/4 cup sugar
1/4 cup oil
1 cup semi-sweet chocolate chips
1. In a medium bowl combine flour baking powder, baking soda, cinnamon, 1/8 tsp salt and dash of cloves. Make a well in the center.
2. Combine egg, bananas, sugar and oil using beaters. Stir until moistened (lumpy).
3. Stir in chocolate chips.
4. Fill greased muffin tins.
5. Bake at 400 degrees for 20 minutes or until golden.
Serve warm!


My taste tester approved!
Subscribe to:
Posts (Atom)